19 How To Make a Schedule – Sam Steeves
Preface
This is a personal time management plan that works for me. These are guidelines, not rules. Adapt it to your own life, but find a system that works for you. Time management is the best way to feel accomplished in your professional or academic life while also allowing time for personal pursuits. This system has works wonders for me; I hope it’s similar for you.
Part 1: Creating an Overall To-Do List
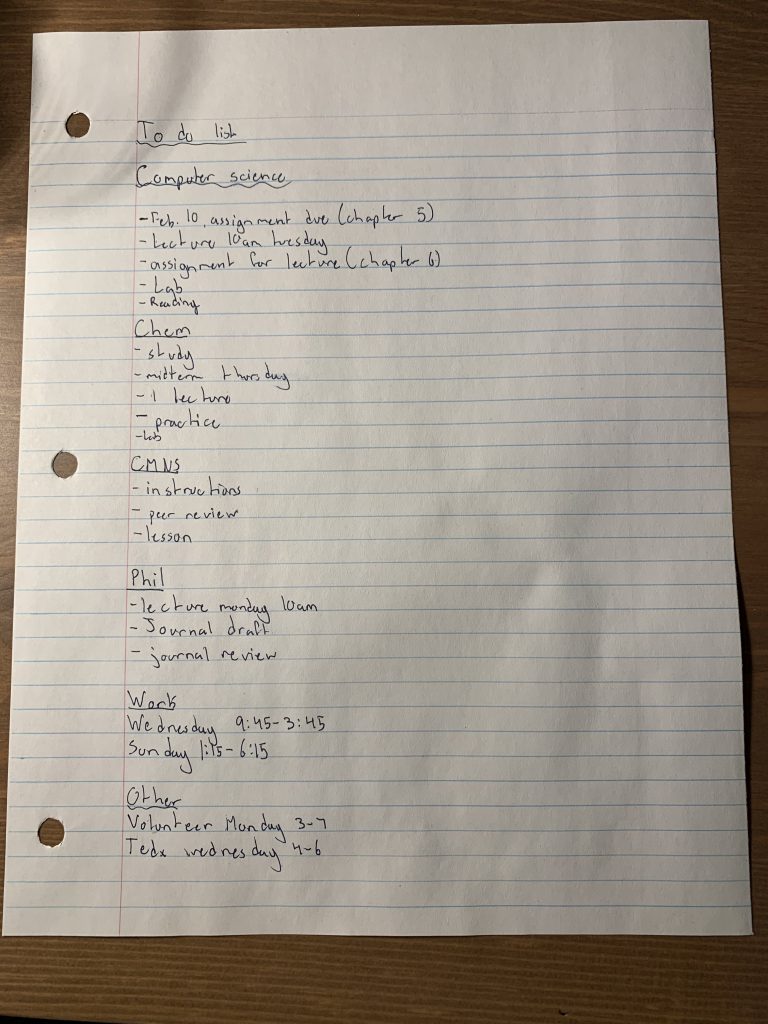
Step 1.1: Sit down in a quiet space with a sheet of loose-leaf paper and a pen or pencil.
Step 1.2: Decide what activity you’re going to write down first. (I suggest starting with your classes.)
Step 1.3: Selecting one course at a time, go through that course’s plan for the coming week and write down every task on your loose-leaf paper (order doesn’t matter yet). Repeat this with all your classes.
Step 1.4: Move to another responsibility. For example, if you have a job, include your work schedule.
Step 1.5: Write these responsibilities on your sheet of loose-leaf paper.
Step 1.6: Repeat steps 1.4 and 1.5 until you have no more responsibilities to write out.
Step 1.7: Rate each responsibility’s importance/urgency from 1 to 4 with 1 being most important and 4 being least important.
Step 1.8: Beside each responsibility, write an estimate for how much time each activity will take.
Example to-do list

Part 2: Blocking Out Your Week
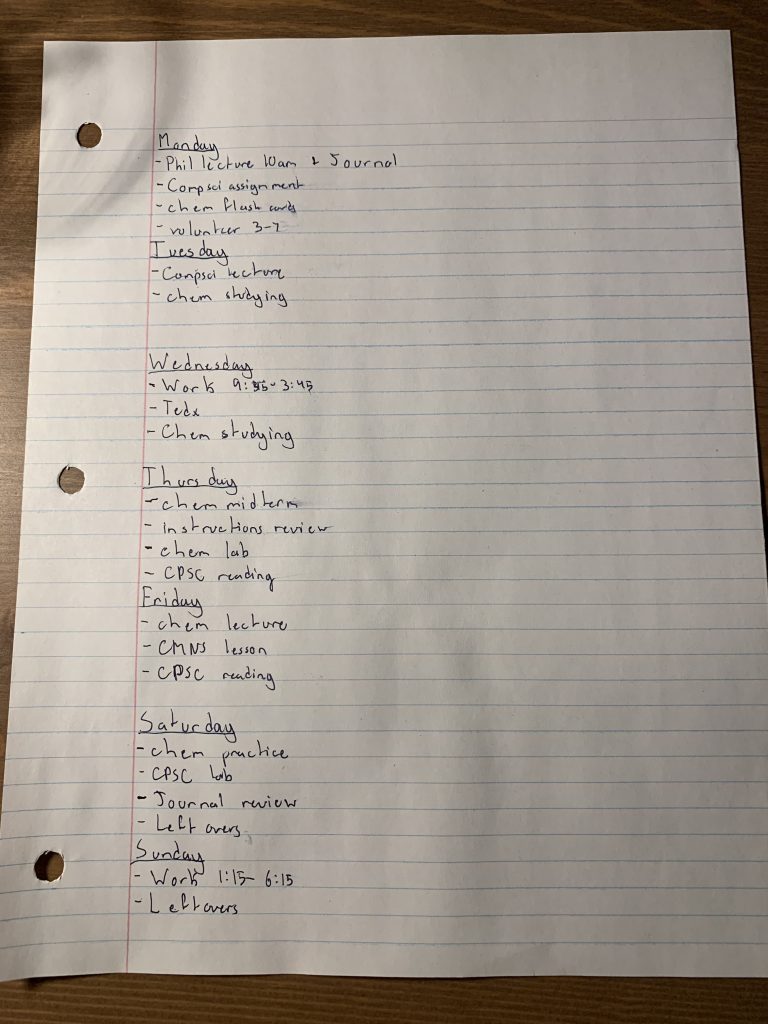
Step 2.1: Get a new sheet of loose-leaf paper and write the days of the week out. Write the day of the month as well if that helps. Start one the paper’s first line and leave 4 blank lines before you write the next day. Write Monday as the first day (top of the page) and Sunday as the last (bottom of the page).

Step 2.2: Carefully considering your time-estimates, due dates, work shifts, and lecture dates and times, write in all your responsibilities that you rated a “1”. Make sure to disperse them evenly throughout your week to avoid burnout.
Step 2.3: Move onto your responsibilities that you rated a “2” and considering the same things as in step 2.2, disperse these responsibilities throughout the week.
Step 2.4: Move onto your responsibilities that you rated a “3” and considering the same things as in step 2.2, disperse these responsibilities throughout the week.
Step 2.5: Move onto your responsibilities that you rated a “4” and considering the same things as in step 2.2, disperse these responsibilities throughout the week.
Step 2.6: Make sure all of your responsibilities are accounted for. If there is anything on your to-do list that you forgot, add it in and if you would like to schedule breaks, add those in as well wherever you please.
Step 2.7: Find a place near your workspace where you know you will be forced to look at your blocked out week to put your sheet of paper for the week. For example, I hang mine above my computer.
Example of a blocked-out week

Part 3: Executing your plan
Step 3.1: Relax! Start your week right by taking the time after you finished blocking out your week (as long as you didn’t do it Monday) to relax and take time for yourself. Pursue your hobbies, spend time with your friends and family, or maybe even just sleep and wind down.

Step 3.2: Determine from what time you’re going to start on your responsibilities, and what time you’re going to end. I recommend treating each day like a regular workday and going from 9am until 5pm with a lunch break (adapt this to your schedule!).
Step 3.3: Wake up Monday morning and get to work. Start strong.
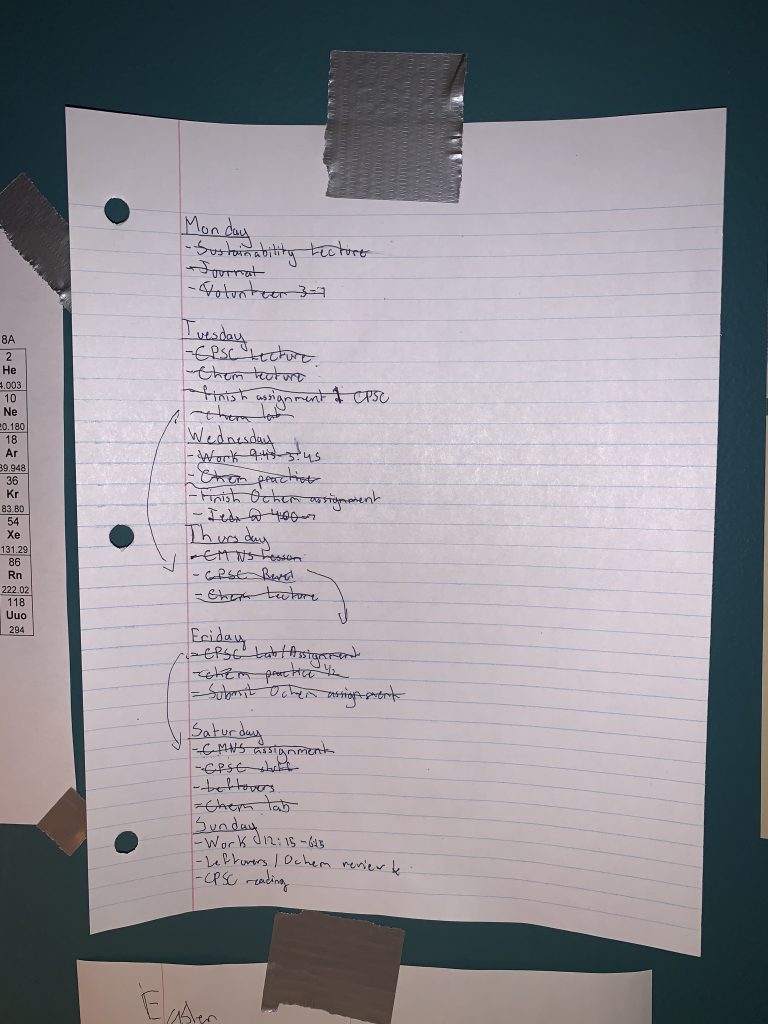
Step 3.4: As you finish tasks, make sure to cross them off your list. This makes you feel accomplished and rewarded and helps to keep you motivated.
Step 3.5: If you find you don’t have time for a task or you finish your tasks early, move don’t be afraid to shift things around. If you don’t have time, move it to another day. If you finish your tasks early, get started on tomorrow’s work or take some extra personal time.
Step 3.6: Repeat steps 3.2 through 3.5 until you’re finished your tasks.

Step 3.7: Go back to part 1 and start your next week!

